Hexing Guides
How To Texture & Anchor Paintballs
Written by Jewellz
Texturing and anchoring paintballs is a VERY IMPORTANT step you do not want to skip! Very few hexes look good with untextured and unanchored spots. Anchoring will make sure the paintball stays in place and won't move around, change size, change shape etc.
NOTE: I recommend only texturing and anchoring the spots on the real breedfile and not the dummy file you use in PW. PW does not store the anchoring, so you'd have to re-anchor the same spots if you add more, plus texture and anchor the new ones.
So you've added paintballs on the dummy horse in PW, you've copied that code from the dummy over to the real file in the game, now you're ready to texture and anchor.
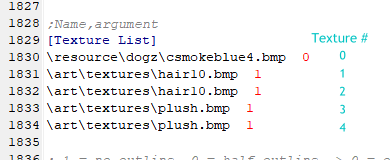
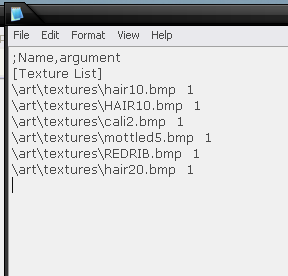
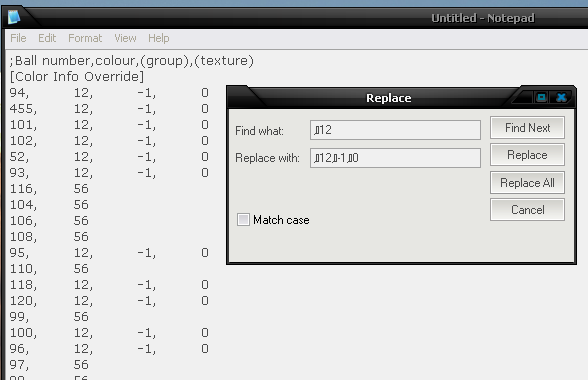
First, you're going to need to know what texture to assign the paintballs. Look for the texture list in LNZ. This is the section where you can change the texture or add a texture to the file. If you'll notice, the first texture was changed to an external texture. The texture list always starts at 0, so the first texture is "0" and the second is "1" and so on. Remember the number of the texture you want your paintballs to be.
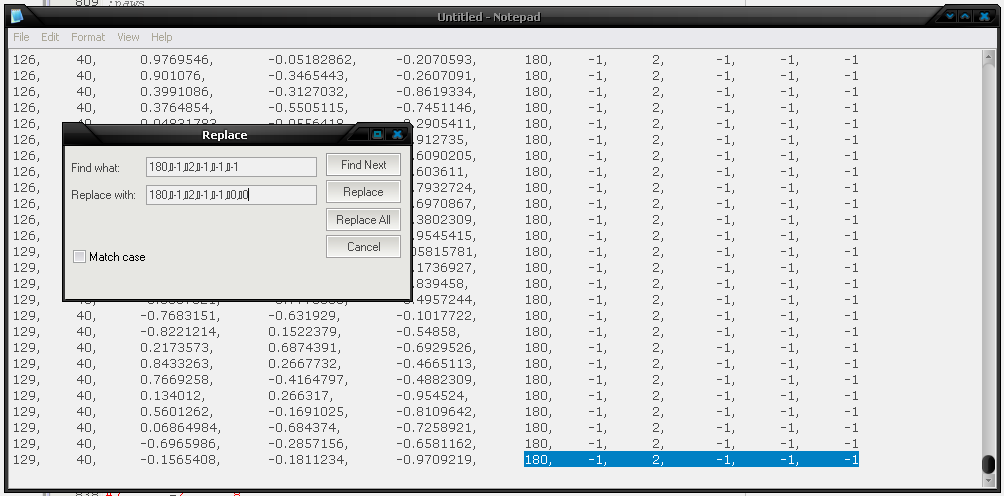
Next, go to the paintballs and you'll see they ALL end in a -1. That -1 is in the TEXTURE column. We need to change that -1 to whatever number corresponds to the texture we wanted to use. In this example, we want to change it to 1.
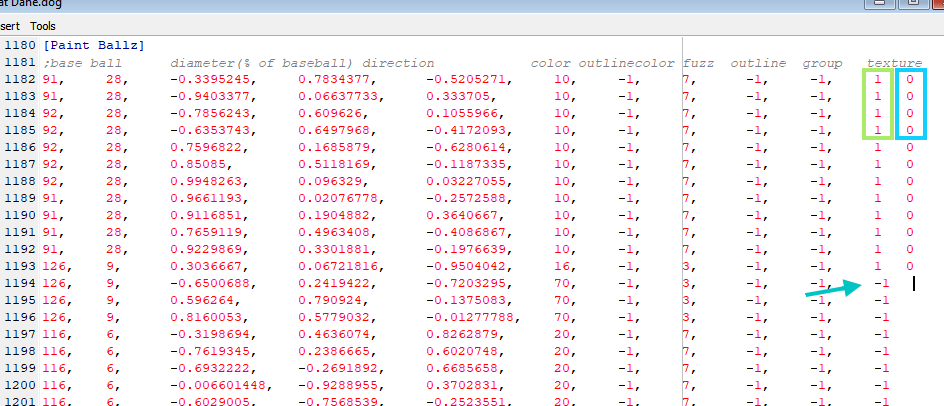
To anchor the paintballs, you just add a space or two (or five, you only NEED one but extra is fine too). Then add a 0. There should be the texture, a space, and then a 0. You can add a comma after the texture (to match all the other columns) but it's not necessary. So in the example above, those first few paintballs have been textured to the #1 (second) texture (in the green box) and the 0s are the anchors (in the blue box).
That's it! It's really easy but if you have more than 30 paintballs or so, you might want to use the Anchor Utility (found in the Downloads > Hexing Tools page) instead. Make sure you save the file in LNZ once you're done texturing and anchoring!
How To Hexpaint a Horse
Written by Haubing
This guide is for a V1 horse BUT there really isn't much difference in the hexpainting aspect - it's the same process on any file. Remember, when you hex a horse based on a Manda V1 or V2 in Petz Workshop, you hex on the dummy file and then save in PW, open the dummy file and the real file (which is in the Petz game) with LNZ Pro, and then copy/paste the [Color Info Override] & [Paintballs] sections to the real file. Then save the real breedfile and go see how it looks in-game.
The nice thing about the Rafa V2 & V3 files is that you can hex on them directly in PW!
--------------------
This tutorial assumes you already know the basics of PW and LNZ Pro. All of this besides specific ball numbering can be applied to any horse file!
Step 1
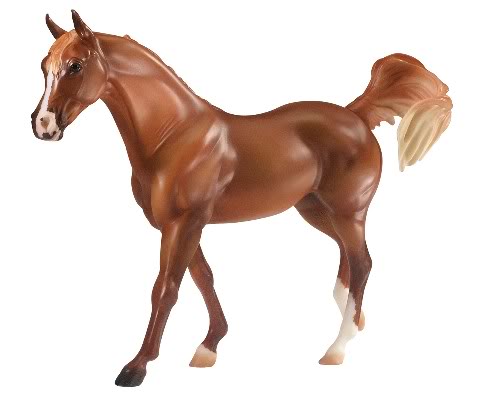
Choose a reference. Carefully. Some horses cannot be hexed and made to look nice just due to the file's limitations.
Manda V1s have quite a few belly balls which can make paint patterns difficult.
Manda V2s are pretty easy to hexpaint just due to the structure.
Manda V2.7s are hard for intricate paint patterns due to shoulder balls and belly balls.
Rafa V2s have belly balls that can make things tricky.
Appy patterns look steller when belly balls are abundant. When the horse moves in game, you'll get different belly balls showing up- more opportunity to show off those spots.
BUT. A creative hexpainter can get around all that with external textures and tricks that you'll just learn as you go.
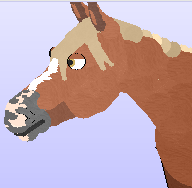
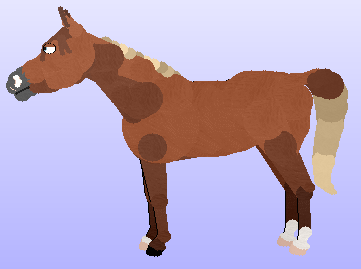
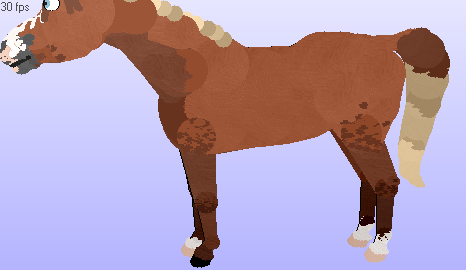
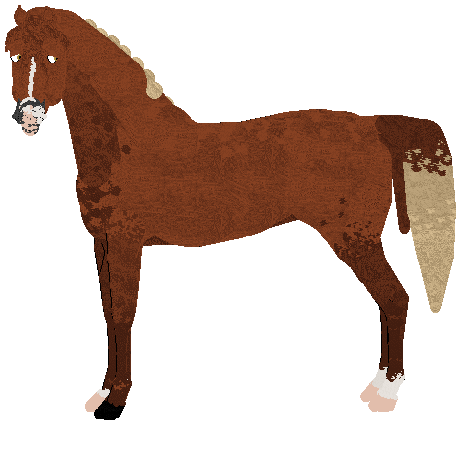
Dream was hexed from a simple Sorrel Breyer model.
Step 2
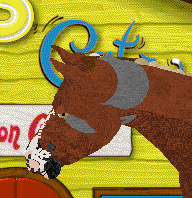
Open the PW Dummy and if you need to, open up Notepad to record what colors you used and where. I used 50 for the main body, and darker colors for shading.
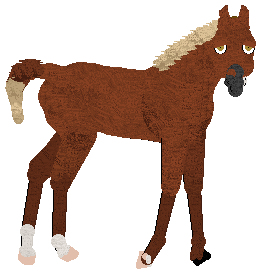
If I were to stop here at a simple ball recolor, Dream would come out of the AC like this foal.
Step 3
Paintballs. Layer them. They'll look amazing.
I started with the muzzle. If you look back at the reference, the nose has a bit of pink with gray/black spots.
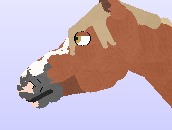
And now for the rest of the face.
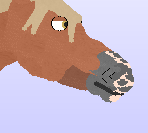
Gray/black to pink blending done.
Face stripe close up.
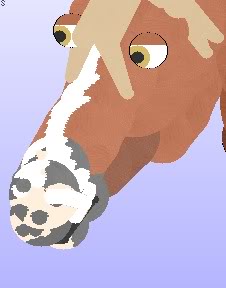
More blending. Added nostril marking to the face. Changed nostril line outlines to 180.
Step 4
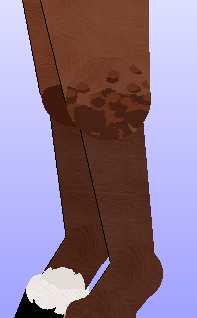
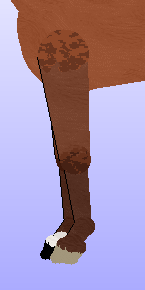
Legs. Blend them. Do a base layer first. This ensures that no matter what the ball outline will be covered.
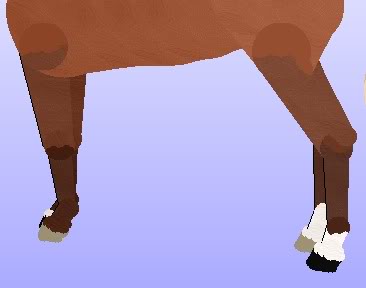
And now blend like crazy. This is time consuming, but I promise it will make your pony pretty.
And do the same to the other side. Depending on the horse, you could "cheat" and copy the paintball codes and flip-flop them to the other side. I didn't do that for Dream because this is a tutorial. XD
Step 5
Making everything look right. Very subtle stuff now, but it does make a difference.
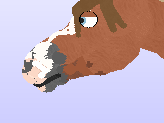
BEFORE
AFTER
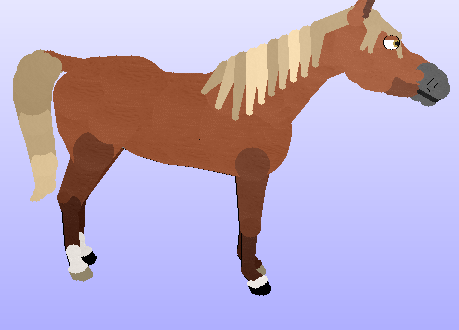
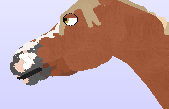
Face is done. Legs are blended. Tail is blended. And the shading is started. I say "started" because you can add highlights.
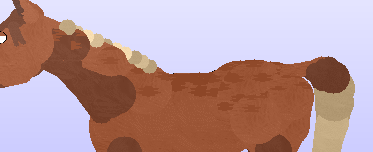
[For this pic, I took away the other paintballs so PW would run faster.]
Technically, you could be done now. You could texture everything but the tail as 1, anchor the paintballs, and then adopt. But. This is an advanced tutorial, so there's a couple more steps. XD
Step 6
Texturing. Dream is going to have SIX total textures. That sounds like a lot, but really, it's not too bad for a hex like this.
Let me break it down and tell you what everything is.
0 covers all the white areas
1 covers the main body and last level of shading on the legs
2 covers the first level of shading
3 is the mane and tail
4 covers the hooves
5 covers the highlights
Here's how to work this onto the paintballs. The last -1 on the line stands for the texture number. Change that to the texture number, then anchor
BUT WAIT. The actual body balls aren't textured yet. Here's how to do it quickly. The first number is the ball number, the second is the color, the third is the group, and the fourth is the texture.
Step 7
The last step is to copy all of your overrides and paintballs over to the regular breedfile.
Bring your horse out of the AC. You might notice something odd (on a V1).
Just recolor those in your overrides with the appropriate color and texture.
327
328
330
116
329
Next, depending on which V1 you're using, you'll see that the mane is not connected to the forelock.
You have two options:
Omit ball #331 from mane.
OR
Reattach the line in PW or LNZ Pro.
307, 331, 0, -1, -1, -1, 100, 100
For certain patterns of horses, you may find that the lines just aren't working out. You can always switch the order of the balls that are linked together to change which ball the line inherits its color/texture from!
Example:
Just change
31, 47, 0, -1, 244, -1, 100, 100
to
47, 31, 0, -1, 244, -1, 100, 100
If you try to change the line's color directly, you'll lose the texturing. This is the best compromise I've found.
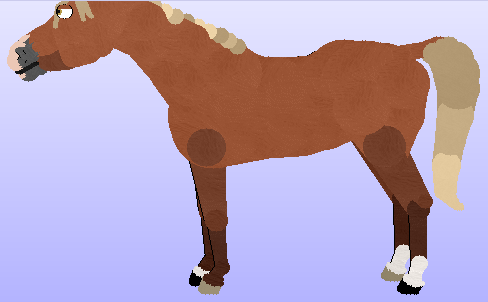
Compare the simple ball recolor to the hexpainted version. Maybe it's just me, but I love that extra dimension that shading can create!
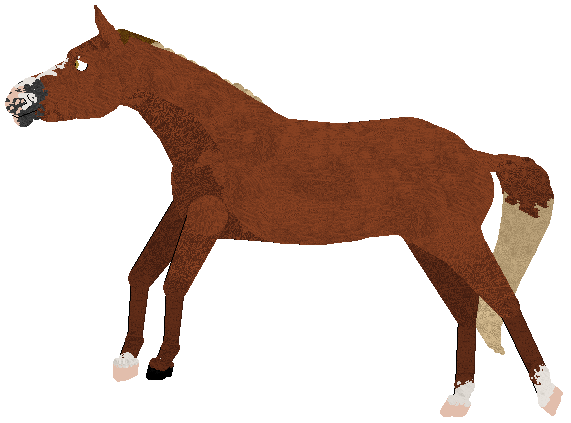
The adult horse shown here had the line reattached, but it's colored 90 instead of 50s. >_> Ignore that, please. Haha.
As a V2, the shading is even more noticeable. I bothered to blend the tail, for example...
Congrats! You have hex-painted a horse. This is not the only way or the best way. It's only meant to serve as a base for you to build and create your own hexing style. =D NOW go forth and hex pretty ponies. xD
More guides will be added soon!